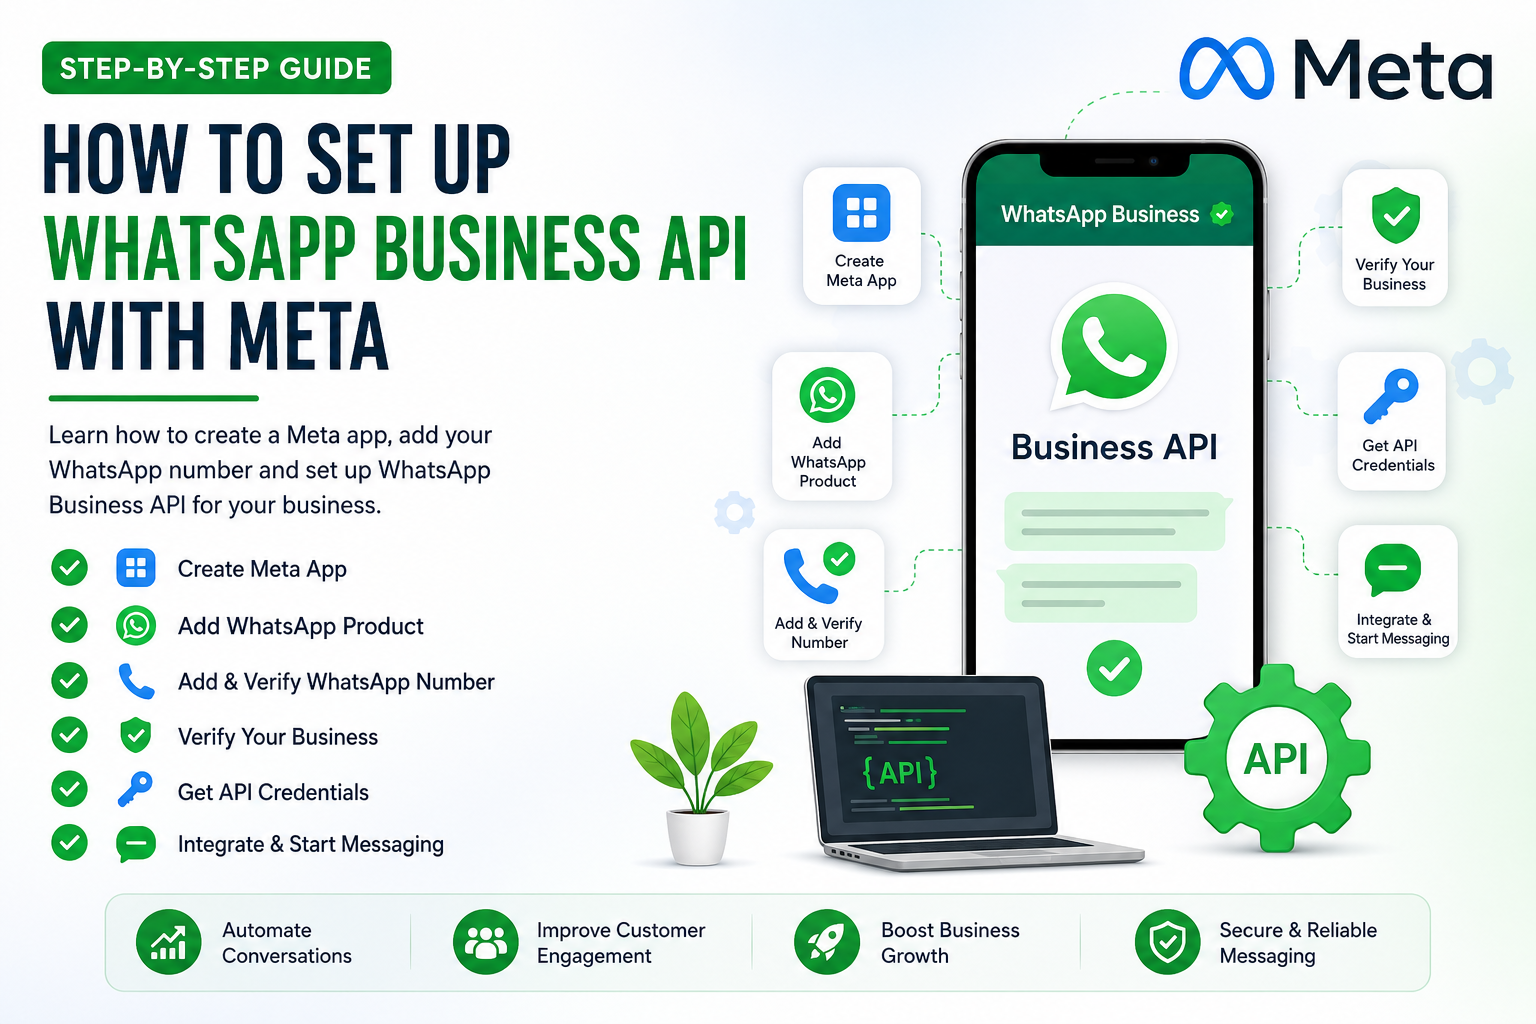
📘 Complete Guide: How to Set Up WhatsApp Business API with Meta
In today’s digital world, businesses need fast, reliable, and automated communication channels. One of the most powerful tools available is the WhatsApp Business API by Meta Platforms .
Unlike the regular WhatsApp Business app, the API allows automation, CRM integration, chatbot setup, and bulk messaging—making it perfect for lead generation, customer support, and marketing automation.
This guide will walk you through how to create a Meta app, set up WhatsApp API, and add your business phone number step-by-step.
🚀 What is WhatsApp Business API?
WhatsApp Business API is a solution designed for medium and large businesses to communicate with customers at scale. It allows you to:
- Send automated messages
- Integrate with CRM tools
- Use chatbots
- Send notifications (OTP, order updates, etc.)
- Manage customer conversations efficiently
📋 Requirements Before You Start
Before setting up, make sure you have:
- A verified business (recommended)
- A phone number (not linked to WhatsApp)
- Website/domain (optional but helpful)
- Access to Meta Business Manager
🛠️ Step 1: Create a Meta Business Account
- Go to Meta Business Manager
- Click on “Create Account”
- Enter:
- Business Name
- Your Name
- Business Email
- Verify your email
👉 This account will manage your WhatsApp API, apps, and permissions.
📱 Step 2: Create a Meta App
- Visit Meta for Developers
- Click on “My Apps” → Create App
- Choose Business as the app type
- Enter:
- App Name
- Contact Email
- Click Create App
👉 Your app dashboard will be created.
🔗 Step 3: Add WhatsApp Product to Your App
- Inside your app dashboard
- Click “Add Product”
- Select WhatsApp
- Click “Set Up”
👉 This will enable WhatsApp API for your app.
📞 Step 4: Add Your WhatsApp Business Number
- Go to WhatsApp → API Setup
- Click “Add Phone Number”
- Enter:
- Business Name
- Business Category
- Phone Number
⚠️ Important:
- The number must NOT already be used on WhatsApp
- If used, delete WhatsApp account first
- Verify using OTP (SMS or Call)
👉 Once verified, your number is connected to WhatsApp API.
🏢 Step 5: Verify Your Business (Important)
To unlock full features:
- Go to Security Center in Business Manager
- Click Start Verification
- Upload documents:
- Business Registration Certificate
- GST / License
- Utility bill (optional)
👉 Approval usually takes 1–3 days
💬 Step 6: Get API Credentials
After setup:
- Access Token
- Phone Number ID
- WhatsApp Business Account ID
These are used to integrate API into your website or CRM.
⚙️ Step 7: Test WhatsApp API
Meta provides a test environment:
- Send test messages using API
- Use Postman or backend code (PHP, Node.js, etc.)
Example use cases:
- OTP verification
- Order confirmation
Lead follow-ups
🤖 Step 8: Integrate with Website or CRM
You can connect WhatsApp API with:
- CRM tools
- Chatbot platforms
- Your website backend
This allows:
- Automated replies
- Lead tracking
- Customer engagement
📈 Benefits of WhatsApp API for Business
- High open rate (90%+)
- Instant communication
- Automation & chatbots
- Lead generation
- Customer support
⚠️ Common Issues & Tips
- ❌ Name mismatch in business verification → may cause rejection
- ❌ Using already registered WhatsApp number
- ❌ Incomplete business details
- ✅ Always use real documents
- ✅ Keep business name consistent everywhere
🎯 Final Thoughts
Setting up WhatsApp Business API may seem complex initially, but once configured, it becomes a powerful automation and marketing tool.
Whether you’re running an e-commerce store, real estate business, or service company, WhatsApp API helps you convert leads faster and improve customer experience.
📞 Need Help with WhatsApp API Setup?
If you want professional help in setting up WhatsApp API, automation, or CRM integration:
Softcurious Technologies
🌐 Website: https://softcurious.com
📧 Email: connect@softcurious.com
We help businesses automate their communication and grow faster 🚀

Leave a comment
Your email address will not be published. Required fields are marked *